Of these 2 jigs, I use one a LOT the other, not as often, but both get used in my shop. The Assembly Jig is one of my top used jigs. I am always using it to hold my work square as I assemble then glue it together. The only real problem with the last ones I made, they seem to be too small as the projects and picture frames I make seem to get larger and larger ...
Watch it on Youtube: https://youtu.be/Bj0PK-MqroA
Time to upgrade the Assembly Jig with some new ideas to make this one last a bit longer and make it easier to use ...
The best wood for an assembly jig is MDF, it's relatively inexpensive, flat and you can often purchase half or quarter sheets of it as your wood store. The only other component you will need is plywood for the sides, but you could also use MDF for this as well. I prefer plywood because it is both stable and easy to plane an edge to around 45 degrees so that when it is glued to the base, any little bits of sawdust won't make get in the way as you snug your wood project up the sides of the jig. For this build, I just used my block plane with about 5 or 6 passes and took the edge down enough that any bits of sawdust would not get in the way of a nice fit. I also MARKED where the edge was so I wouldn't put the arm on wrong ... a simple but sometimes crucial step ... marking your wood so you don't assemble wrong.
One of the reasons I need to keep re-making this jig is because I often seem to get glue either on the sides' alignment arms or on the base which can often lead to misalignments if you are not careful. The fix for that is to use Paraffin wax the will either prevent the glue from sticking to the arms and base or at least make it easy to remove.

As you can see in the video I marked off an area where I did not want paraffin wax to get because I would be gluing the arms down there and by applying masking tape to the inside of my pencil line I could add the paraffin was to just slightly under the arms ... I also added paraffin was to the sides of the arms.
I know some of you may be concerned about the wax "getting on your project" but I have never seen that happen. I have been using paraffin wax in the workshop for at least 2 decades and have never encountered a time where the wax interfered with anything, even a topcoat finish.
Once the piece has been waxed, all it takes is a bit of glue on the base and I add one of the arms to the base, align it with the edge of the base and tack it down with an air nailer or even just some fine finishing nails.
Next, you will want to attach the second arm but do NOT butt it right up to first, leave a bit of space, again to ensure wood chips and dust can be easily removed. In this case, you will need to align the second arm using a "Square" Carpenter's Square. I say this because sometimes these are not perfectly square and need a bit of adjusting. You can see detail here.
Now because you have chamfered the bottom of both arms, you can't really expect a Carpenter's Square to align perfectly so you will need to elevate it slightly so it can sit flush with plywood sides. Tack with an air nailer, check alignment, and finish tacking. That's it you are done!
Next, we move along to the Lap Joint Jig which I originally made as a Tenoning Jig as it fulfills both functions, but since someone asked what is the "STRONGEST" joint, for this article we are treating it as a Lap Joint Jig.

If you will be using this jig a lot, you may be interested in"Toggle Clamps" rather than using one of the set clamps as I use in the above picture. The nice thing with the toggle clamps is that they are handy to use and the ones I have listed from the Amazon Store are reasonably priced too.
You can check them out here at the woodworkweb Amazon store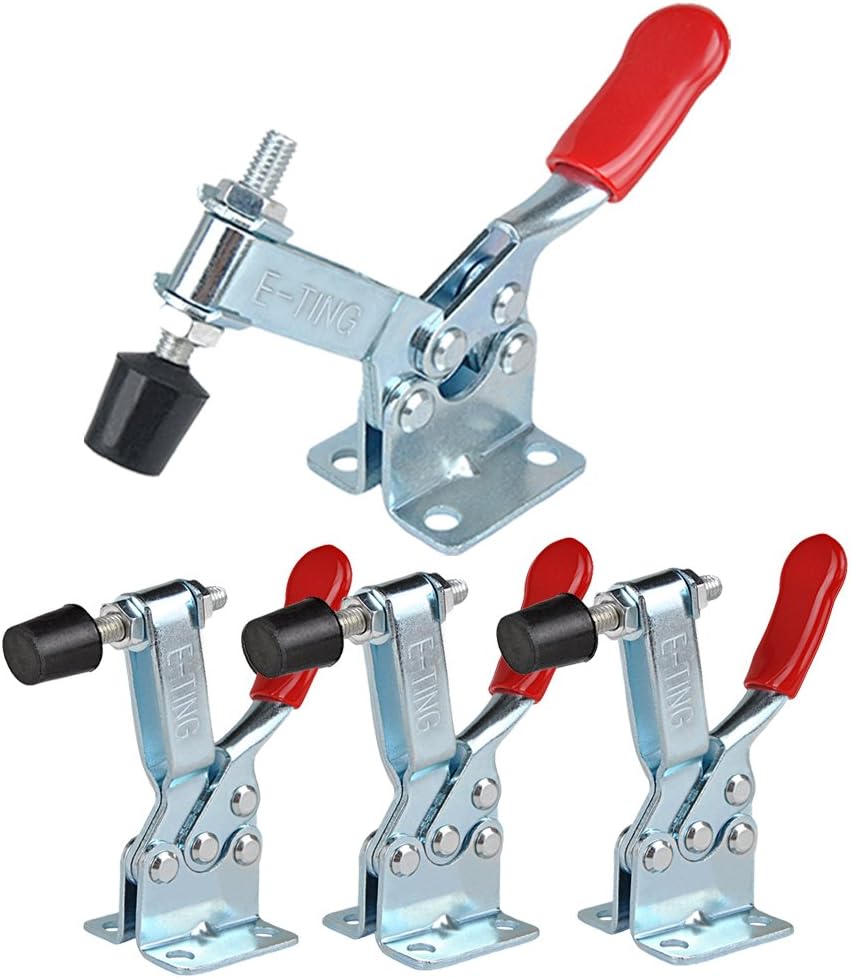
For those of you who do not have wide fences like mine, such as the narrow fences that come with many of the contractor's type saws, as I mentioned in the video, on the "outboard" side, if you substitute for a larger piece of wood, such as a 2X4 (trimmed and jointed of course) With this you will get a much more stable jig.
Set-up is easy and for this entire Lap Joint Procedure, I did not use a measuring tape once. As you saw in the video the set-up for making the shoulder cut was done using the existing sides of the MDF frame where I cut the Lap Joint from.
In the picture below I am using my 3/8 inch measuring bar to set the width of the cut which in this case is half of the 3/4" MDF wood I am cutting.

If you are new to woodworking and have not heard of measuring bars, below is a link to the listing on the Amazon woodworkweb store, you can check these out by clicking the link.
These are my PREFERRED measuring bars, you can purchase a much more expensive one but these cost MUCH less and are actually BETTER !!!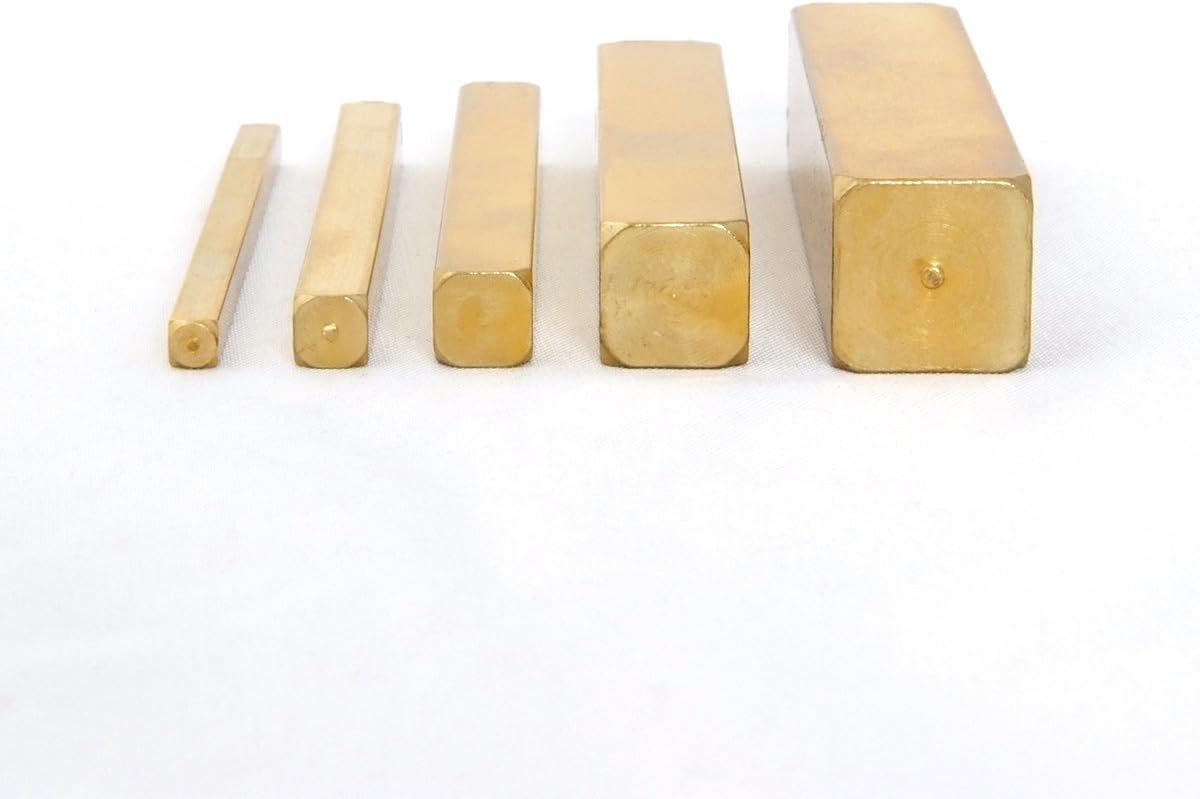
Below is what the cut would look like as the blade is cutting the slot from the MDF.

And here is the final cut. I highly recommend making a test cut to get the fit perfect. I got lucky on this cut and it cut exactly where I needed it but I often need to make test cuts because it is a very fine line when you are only cutting half of each side. Probably the most challenging cuts you will make on your table saw so take your time and "sneak up" on a perfect fit.

For information on how to make the Lap Joint (or Tenoning) you can find the article and video by clicking HERE
Don't forget you can always find more information by typing a topic name into the search box near the top of this page.
Copyright Colin Knecht
woodworkweb


