The one thing I like most about woodworking is that if you need some sort of a special piece of furniture, with a little bit of wood and a few hours of time you can build something that not only looks and works great but soon becomes a family heirloom ...
Watch it on Youtube: https://youtu.be/huv_yOtp3gQ
This little table can easily be built in a day ... but you might need another day or 2 to apply the finish, depending on what you use, and it's sturdy and just the right size for a living room end table.
The first thing I started off with was the legs. I wanted square legs with a bit of tape near the bottom but the problem was that I didn't have any 2 inch material in the Red Alder that I wanted to use for the table ... so, I used a trick that the classic furniture makers used. I found some boards that I could cut to a 2-inch width, that were already 3/4" wide, then book-match them together and glue them and the wood on the side where the seam was would be a near-perfect match. To make sure these boards didn't move like glued up boards can do, I used a dowel in the top and bottom of each board to keep them from sliding back and forth.
While the legs were being glued up picked out some wood for the rest of the table. I wanted to have some "character" to the table so I selected some pieces of wood that had some large knots that had splits in them but that felt solid otherwise. To these boards, I applied some fresh black CA glue that is available off the shelf direct from Starbond. The CA glue bonds and seals the cracks the black color seems to be the best color to use to help blend the wood.

Top 15" x 29"
After gluing the top and the shelf together and allowing that glue to harden, I began trimming to size, the bottom shelf brackets, and the table skirt.
Legs 1.25" square byt 24" long
By this time the legs were dry and hard enough to use so I trimmed them down to a square size of 1-1/4" and 2 feet in length. Next, I set up my tapering jig on the table saw and set the taper for a very slight angle that would only trim up about 6 inches from the bottom of the leg and adjusted my table saw fence accordingly.
I trimmed off all the tapers on all the legs and then use a round-over bit on my trim router to ease the sharpness on each corner of the legs.
Skirt 2-1/2" x 3/4" x 24-1/2" & 2-1/2" x 3/4" x 10-1/2"
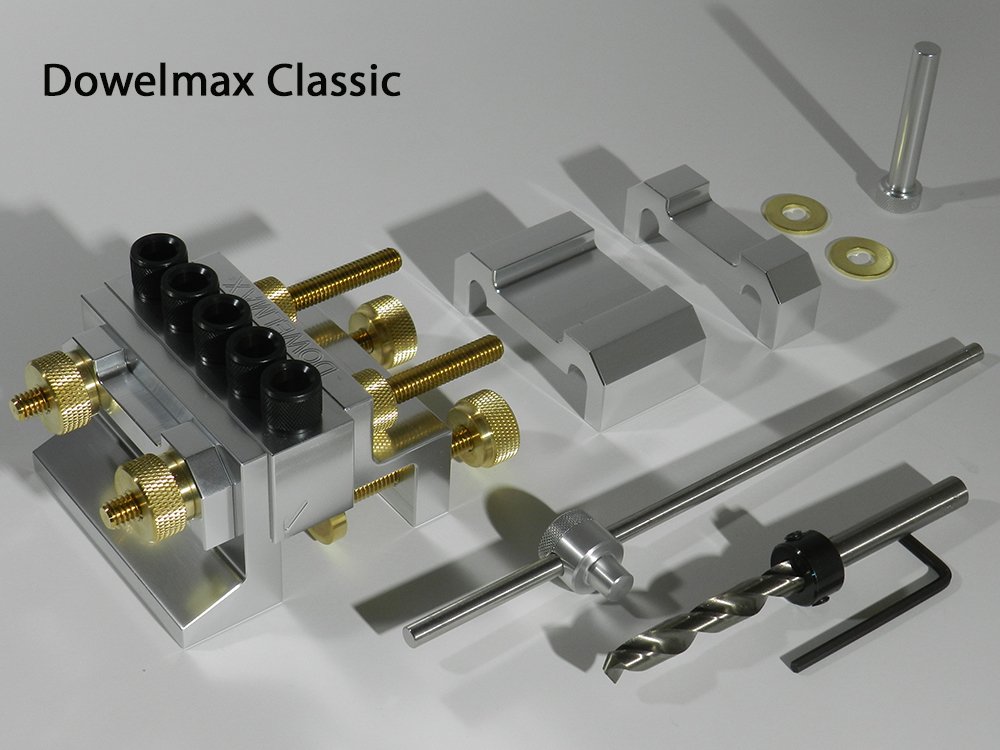
Next, I began cutting the dowel holes with my dowelmax jig. I have been using the dowelmax jig for many years now and I can't imagine building without it now. It gives me very strong joints, easy to use but what I like most is how accurate it is. I really like nice tight, accurate joints and as much as I like cutting mortise and tenon joints ... I spend so much time making them perfect it became a tedious job for me and was taking away much of the fun of building things.
Lower Shelf is 9" from the floor and is 3/4" thick - cut sides to fit however you like the shelf to fit.
When all the dowel holes were cut, I did a dry fit to make sure everything lined up and it was all good because next comes the finishing. Yes, I pre-finish all the parts before I put them together. They are always easier to finish before assembly and I don't have to worry so much about glue marks. Pre finishing is much quicker and easier and usually gives better results.
Dowelmax is available direct from Dowelmax.com .
For a finish I chose a walnut, water-based dye that I often use and yes it raises the grain a bit, but that's one of the secrets of finishing .. raise the grain with a bit of water, scrape or sand the raised portion off and now you have a super smooth finish.
For the top coat I used 3 layers of Osmo and after the last coat, I lightly sand with an 800 grit wet/dry paper with water to give a super fine finish to everything.

Assembly is the last and easiest set. All the wood is finished and dry so filling the dowel holes with a bit of glue and putting it all together is quick, easy and fun to watch the table come together at last. The few areas that I did get a little bit of glue squeeze-out are easily taken care of with a bit paper towel or a clean rag and because the pieces are finished the glue comes off like nothing ... easy, easy.
Remember that this is a side table, so the actual front is the narrow part of the table which is where I concentrated the best angle of my legs and the wood in general. The lower shelf could also have been connected directly to the legs without using the shelf brackets but I have repaired too many of these kinds of tables where the lower shelves are connected directly to the legs ... they just seem to want to come apart after a while, which is why I chose the much sturdier and long term advantage of using the shelf brackets.
The table is now in its place, sitting beside my favorite chair and yes it has lots of "stuff" on it now and my woodworking magazine are now easy to get at on the lower shelf with access from front, back and sides .. just how I like it ...
Copyright Colin Knecht
woodworkweb.com


